From SQL query to printed label, in eight steps.
Follow a real example — a 2.75″ × 1″ product label with code, description, price, branch name, and a UPC barcode — from template design to a stack of printed labels at the right location.
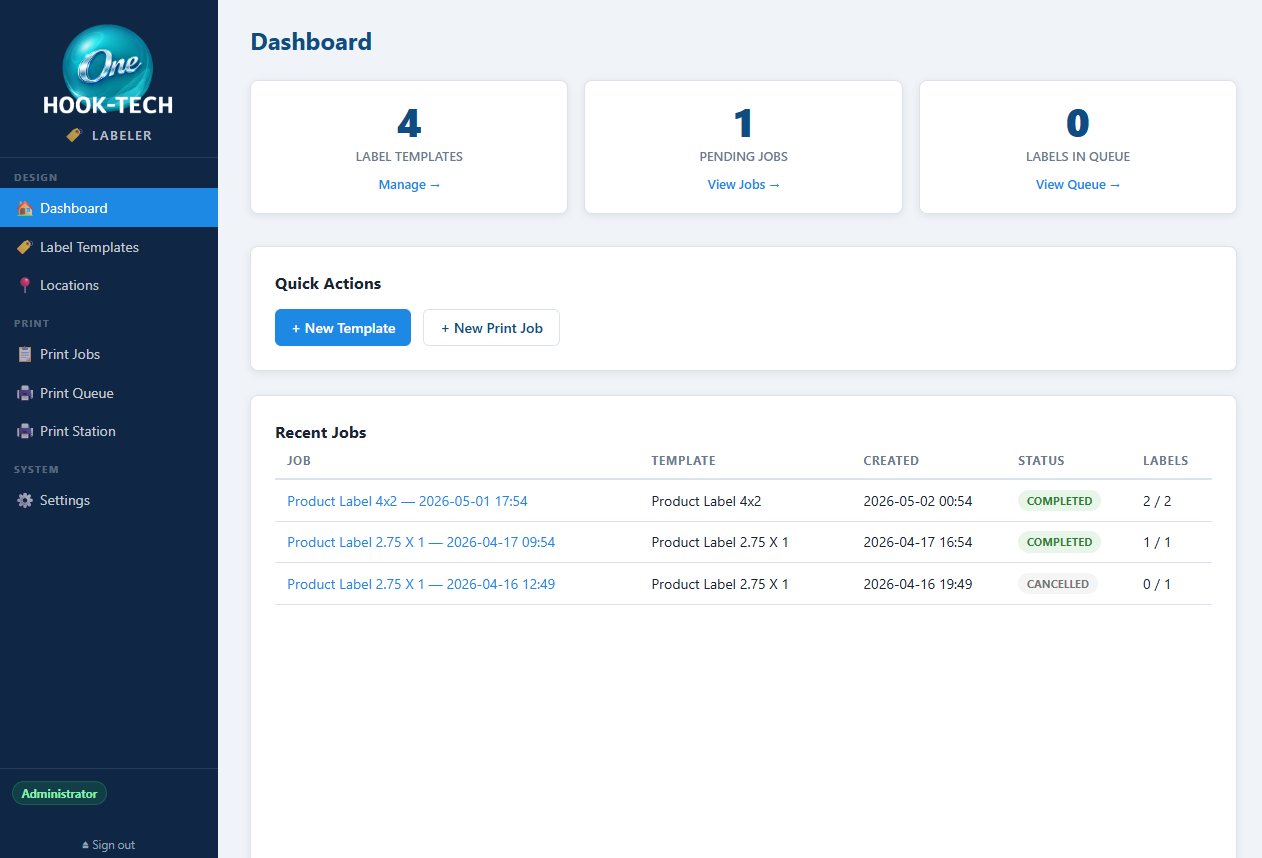
One dashboard, location-aware.
The Labeler dashboard shows label template count, pending jobs, labels in queue, and a Recent Jobs feed with status (Completed, Cancelled, etc.) — every print run is logged.
The big idea is in the sidebar: Locations. Set up branches, warehouses, or trading divisions once, and Labeler can pass the selected {{Location}} ID into any label template's SQL query at print time. A single template renders different data for different locations — and as you'll see in step 7, each location can even have its own printer.
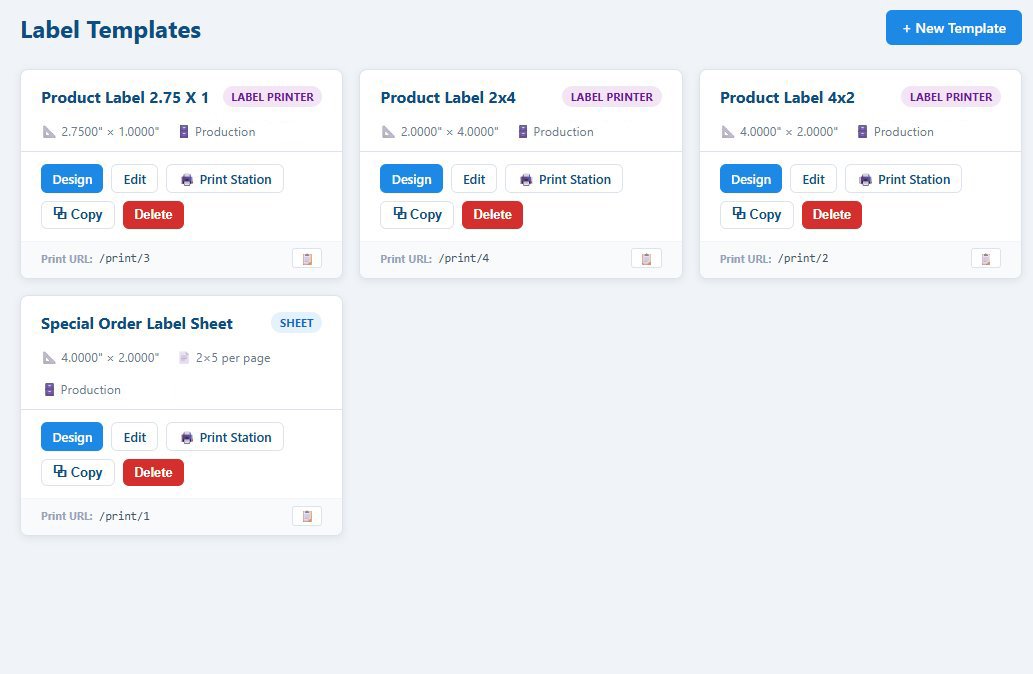
Label printers or full sheets.
The Label Templates library lists every template you've built, with its dimensions, data source, and a quick-action row — Design, Edit, Print Station, Copy, Delete.
Each template is one of two types. Label Printer templates (Zebra, Dymo, TSC) print one label per record on a continuous roll — perfect for product tags, shipping labels, shelf-edge labels. Sheet templates lay out multiple labels on a single page (like 2×5 per page) for laser printers — perfect for batch jobs and special orders.
Every template gets its own shareable Print URL — send /print/3 to a colleague and they jump straight to that template's Print Station.
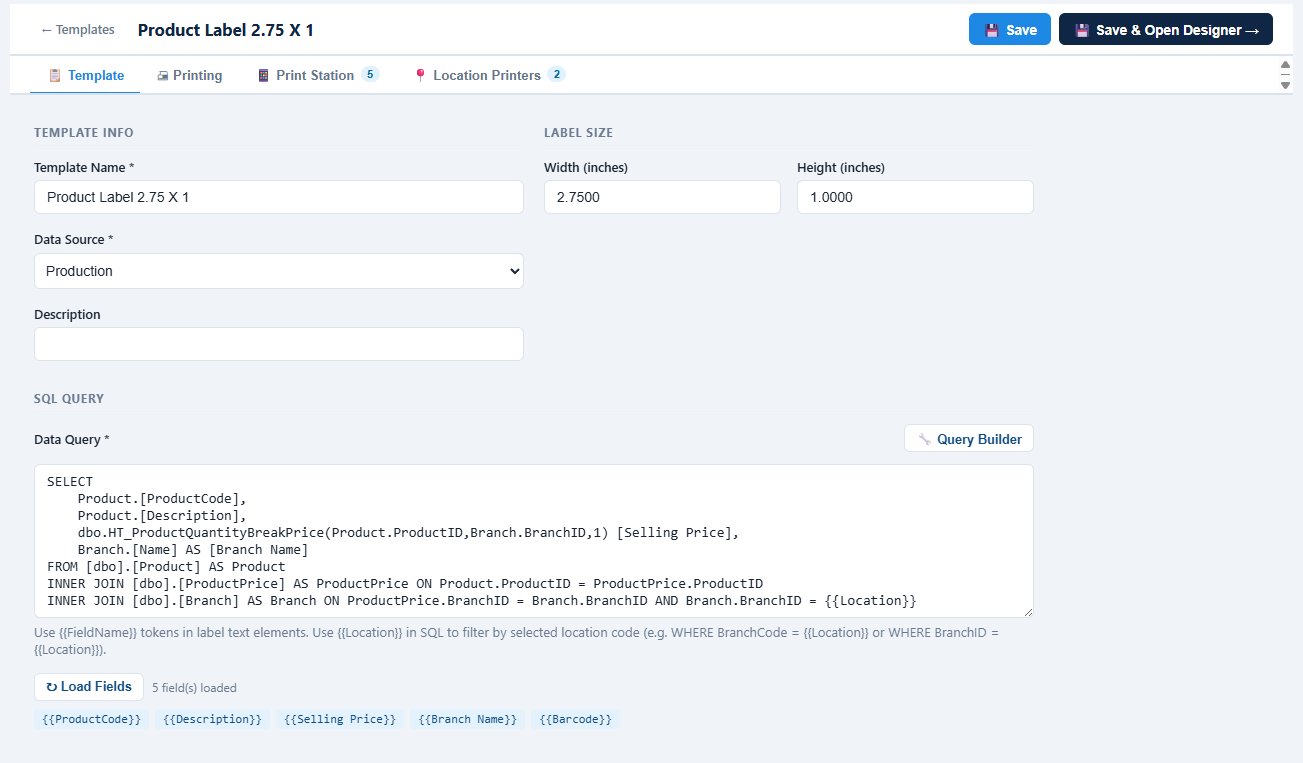
Name it, size it, query it.
The template editor opens in tabs — Template, Printing, Print Station, Location Printers. On the Template tab, set the name, the Label Size in inches, and pick a Data Source — or skip ahead and let AI handle everything..
The SQL Query box is the heart of every template — write the query that returns the rows you want to print. Use a Query Builder if you'd rather click than type. Drop {{Location}} anywhere in the query — WHERE ProductPrice.BranchID = {{Location}} — and at print time, Labeler substitutes the selected location's ID. One template, every branch.
Click Load Fields and Labeler parses your result set into clickable field chips you'll drop onto the label canvas in the next step.
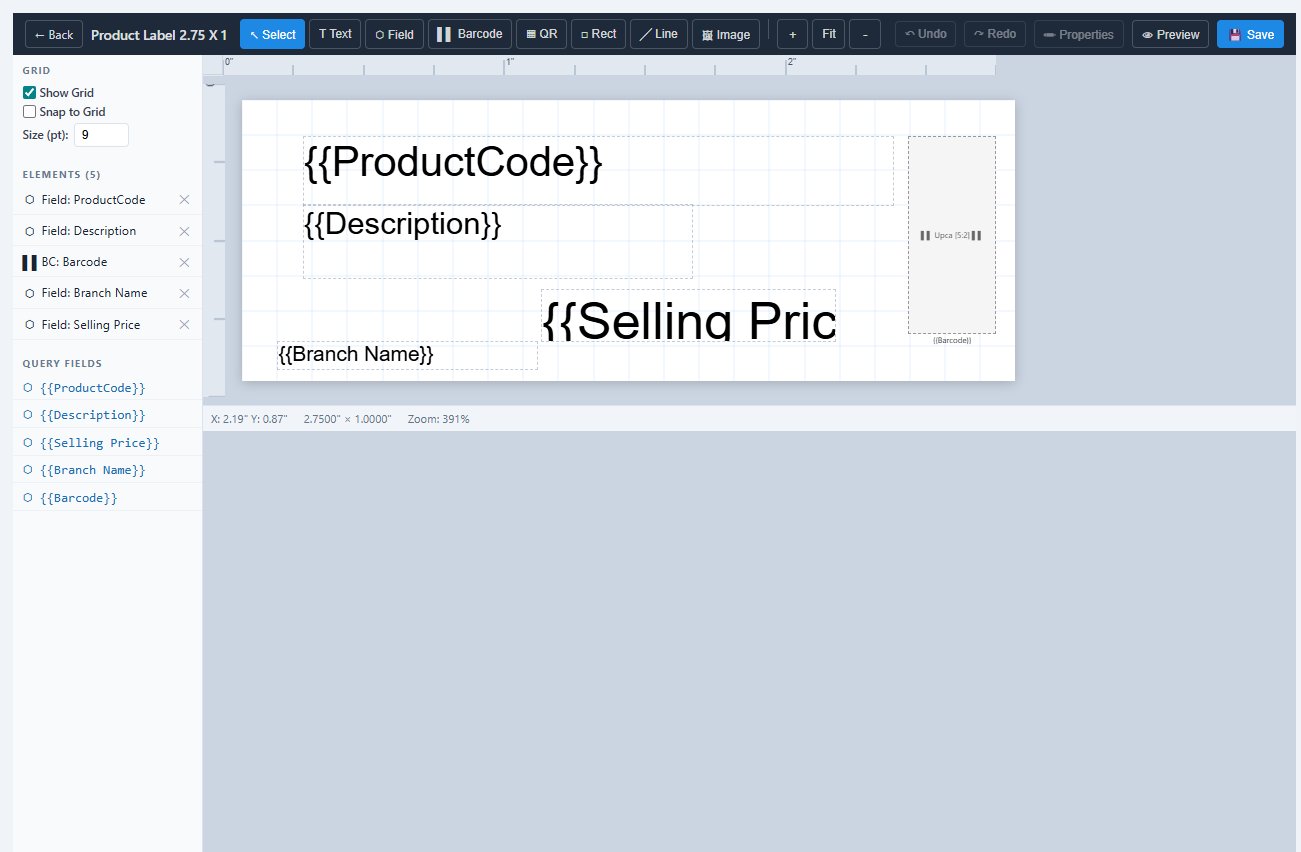
A visual canvas with rulers and snap.
Click Save & Open Designer and you're on the label canvas with rulers in inches, a snap-to-grid option, and a zoom control. The toolbar gives you every element you need — Text, Field, Barcode, QR, Rect, Line, Image — plus Fit to size content to the label and Preview to render a sample.
The Query Fields panel on the left lists every field your SQL returned — click {{ProductCode}} and it drops on the canvas as a placeholder that gets replaced with the row's data at print time. Drag, resize, align — and the Elements tree shows everything you've placed.
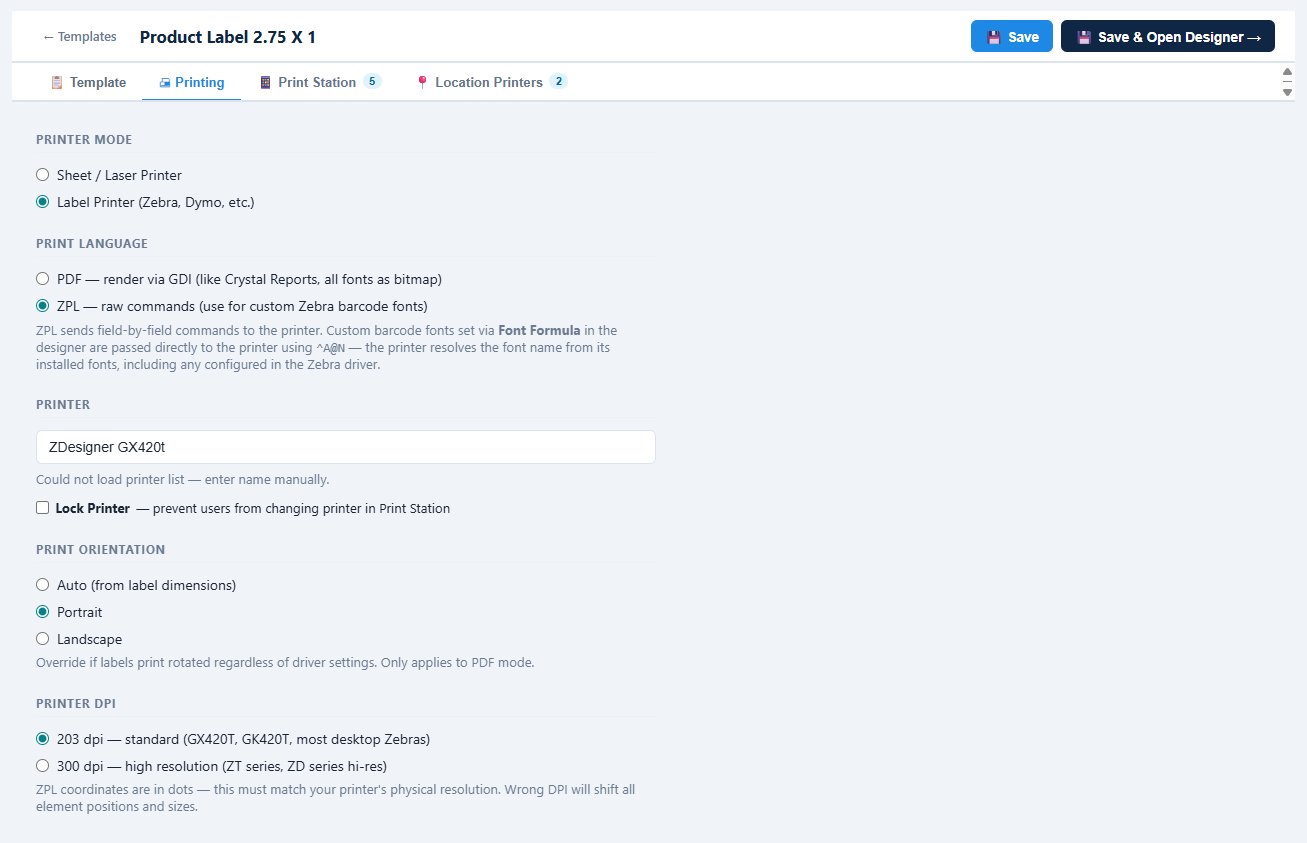
PDF for sheets, ZPL for speed.
The Printing tab is where the template meets the printer. Pick Sheet / Laser for multi-up label sheets, or Label Printer for Zebra-class thermal printers.
Then choose the print language. PDF renders the whole label as a bitmap — works on any printer, fonts always look right. ZPL sends raw field-by-field commands directly to a Zebra printer using ^A@N font references, so the printer resolves fonts from its own installed set (including the custom barcode fonts you configure in the Zebra driver). The result: much faster prints and razor-sharp barcodes rendered natively by the printer rather than rasterized.
Set the Printer name, choose DPI (203 for desktop Zebras, 300 for ZT series), and optionally Lock Printer so end users can't change it in Print Station.
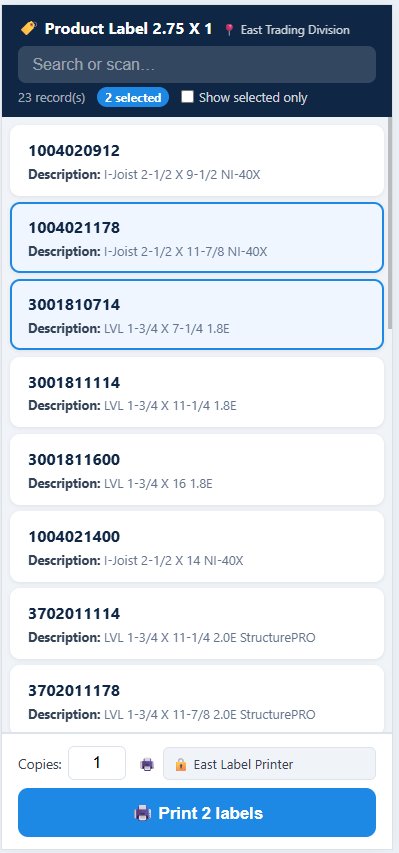
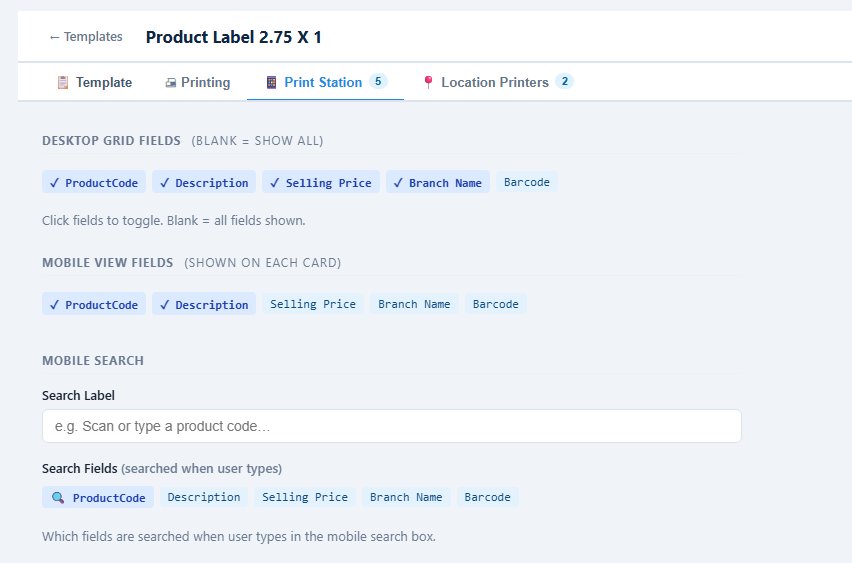
Different fields for desktop and mobile.
The Print Station settings tab controls what your end users actually see when they go to print. Pick which fields appear in the desktop grid and — separately — which fields show up on each card in the mobile view. Mobile usually wants less, so you might show ProductCode and Description on the card and keep Selling Price, Branch Name, and Barcode for desktop only.
Set a Mobile Search Label ("Scan or type a product code…") and pick which fields the search box actually queries — typically the code and description, sometimes the barcode too. A barcode-scanner-friendly search field on mobile means a warehouse worker can scan a product and instantly filter the list down.
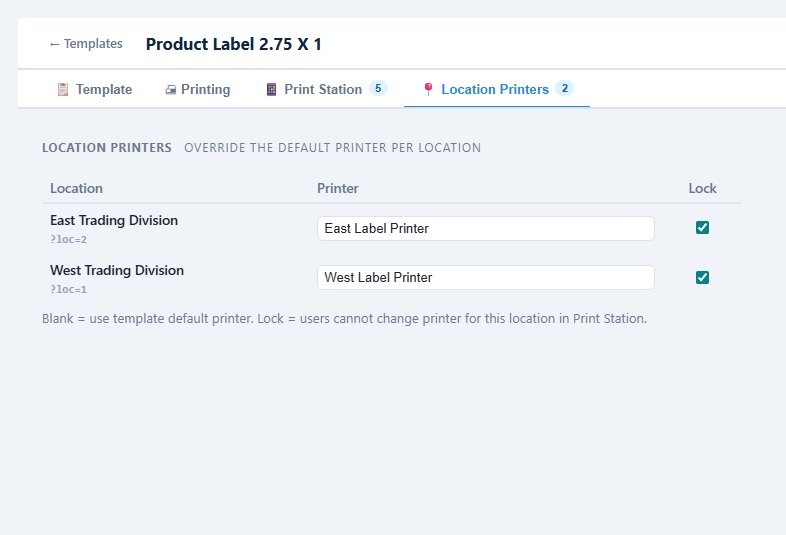
The right printer at the right branch.
The Location Printers tab closes the loop on the location story. For each location you've defined, override the default printer with a location-specific one — East Trading Division → East Label Printer, West Trading Division → West Label Printer. A user in the east warehouse prints to the east printer, a user in the west warehouse to the west, all from the same template.
Combine this with Lock Printer and you've made a template that's truly location-bound — the data is filtered by location through the SQL {{Location}} parameter, the printer is set by location, and end users can't override either one.
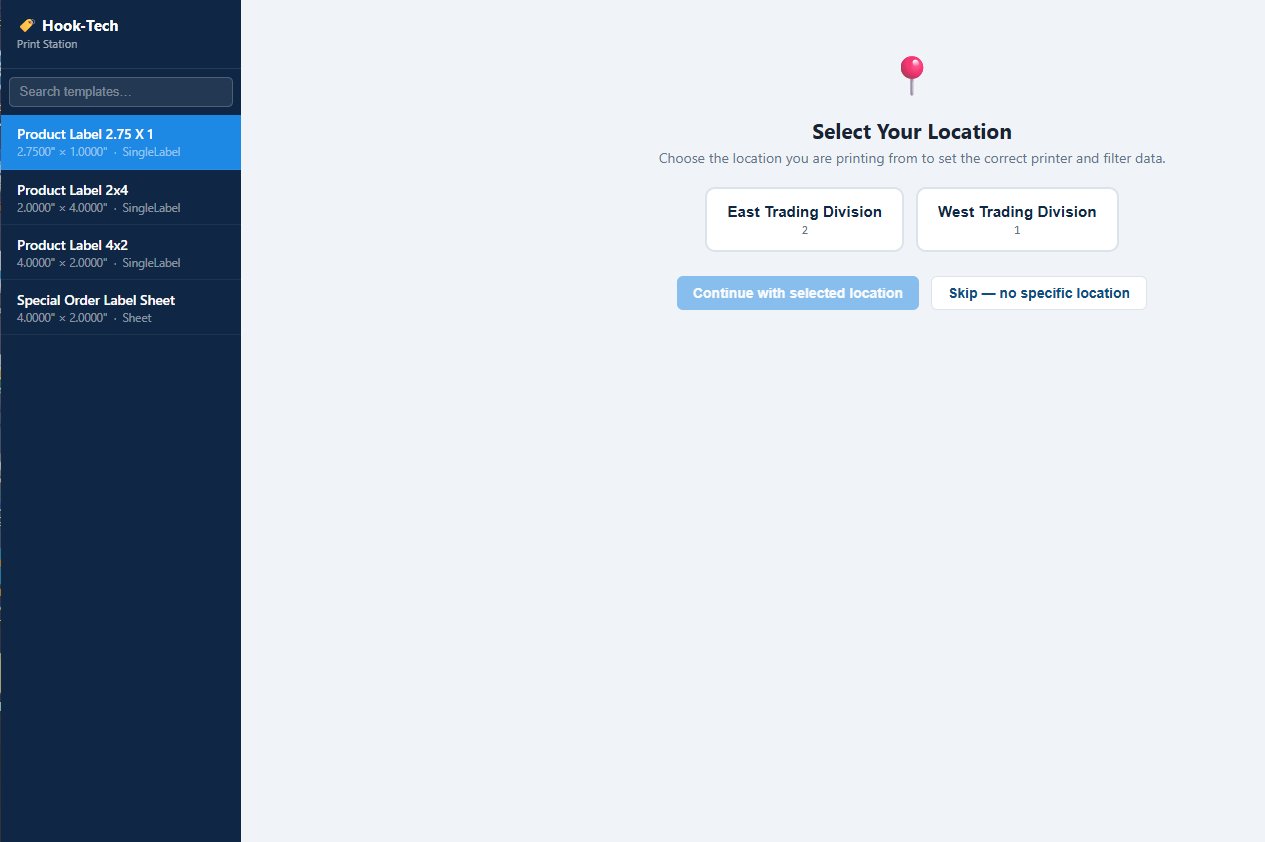
Print Station, end-to-end.
End users open Print Station (or hit the template's shared /print/N URL). If the template uses locations and they have permission to choose, they see a Select Your Location prompt first — pick East or West, or skip if it's not required.
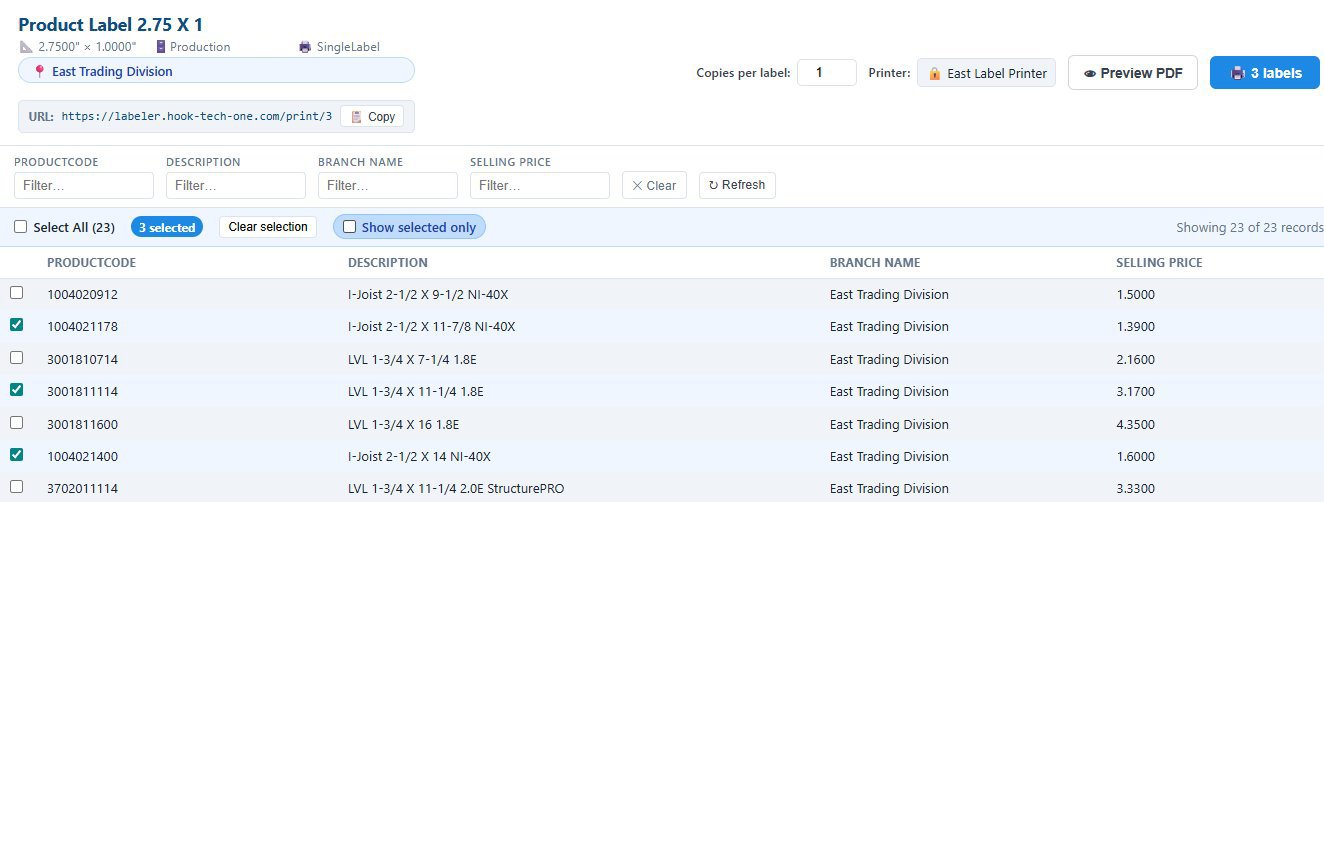
Inside, the records load filtered by location. Filter columns at the top, search, select multiple records with checkboxes ("3 selected" shown on screen), and the print button shows the exact count — 3 labels. Preview PDF lets you sanity-check the output before committing. If the printer was locked, the printer field is read-only.